Branding Your LoudDoc
Add a professional, familiar touch to each LoudDoc you share.
Adding your logo, web domain, and your contact information to every LoudDoc builds confidence in the information you are sharing. It lets your customer know they can trust the content you are presenting.
Brand Kit
The Brand Kit is where you can configure your account to display your branding and contact information across all your LoudDocs.
This speeds up the process of making your LoudDoc and ensuring it looks as professional as possible. Instead of adding these elements to each LoudDoc as you create it, your branding will automatically be added.
Logo
Your logo is your most recognizable attribute. It represents your brand and gives a sense of confidence and expectations around the content it's attached. You can add four different variations of your Logo to your LoudDoc presentation.
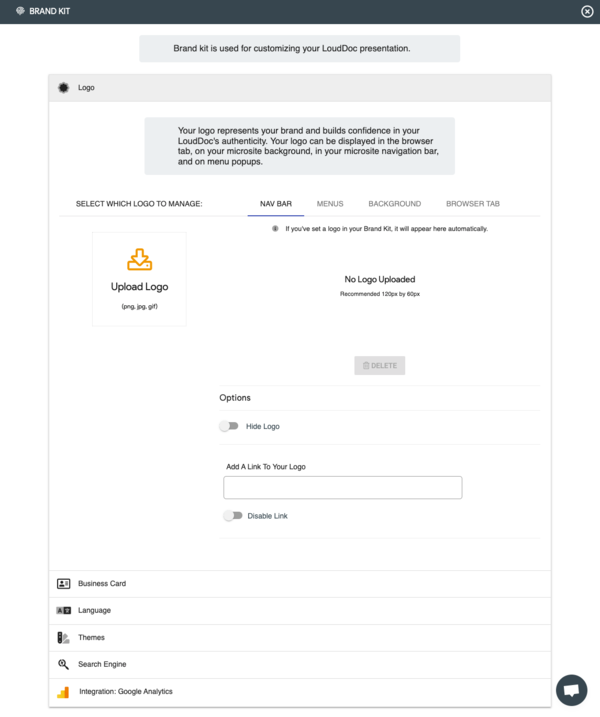
# Add Your Logo
There are four different locations your logo can be displayed:
Navbar: This displays your logo in the navigation bar of your LoudDoc. It will appear all the time and doesn't disappear when your pages are flipped.
Menus: This displays your logo on the menus that appear when activated from your navbar.
Background: This places your logo on the background of your LoudDoc presentation. It will appear in the top left corner below the navbar.
Browser Tab: This places your logo in the browser tab as a small 16 by 16 icon.
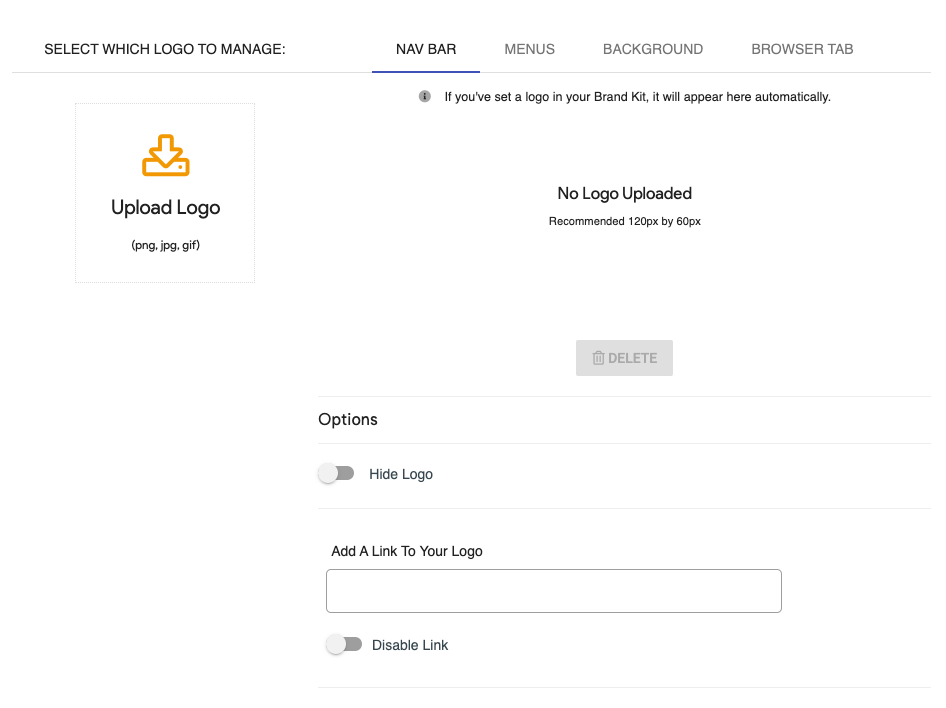
# Options
You can set your navbar and menus logo's to be clickable. Usually this is a good place to put the URL of your organization's website.
# Change Your Logo
You can upload a new logo at anytime. It will automatically change for all new and existing LoudDocs. Tap the upload button for the current logo you wish to replace.
Business Card
Providing fast and accurate ways for your customer to get in touch with you is critical to building an effective relationship. On LoudDoc, we accomplish this by adding a business card with all your contact information available at anytime, no matter where your customer is in your LoudDoc.

# Add Your Contact Information
Complete the form fields for your business card. The more you complete the more channels your customer will have to reach out and connect.
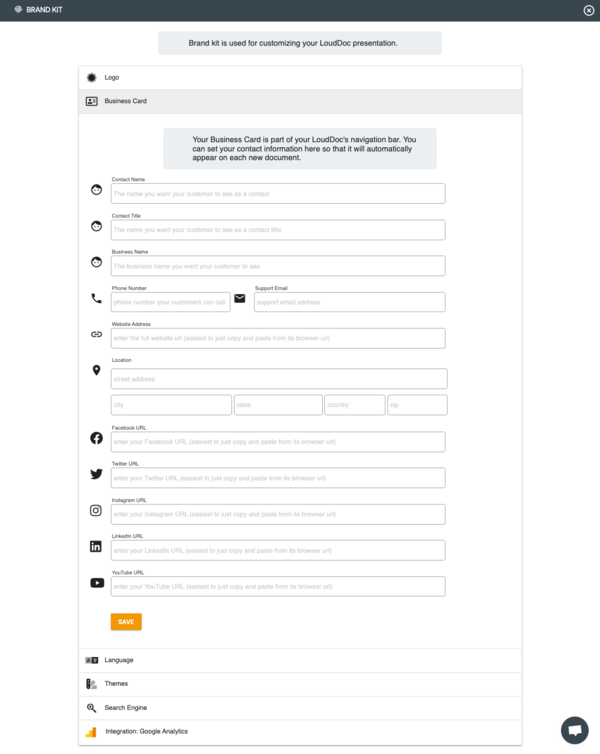
Any fields you leave blank will not appear on your business card.
# Display Your Business Card
Your business card will automatically appear on your LoudDoc in the navigation bar. You can also toggle it on or off from the DESIGN tab, under settings.
Language
Using the native language for your customer audience is key to building confidence in your LoudDoc presentation. It reduces confusion and misunderstandings for your customer as they navigate your LoudDoc.
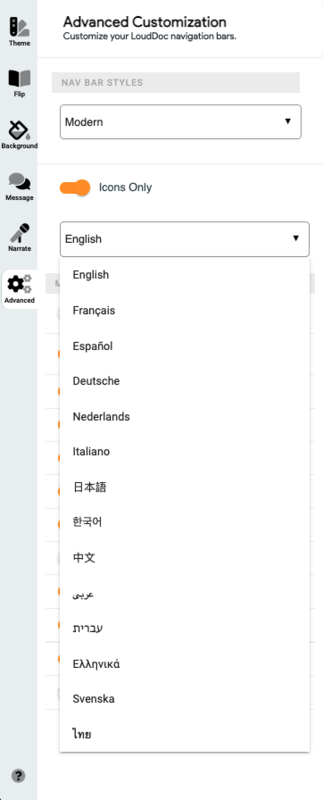
# Selecting a Language
In the dropdown menu, select the language to be used for your LoudDoc presentation page. This will apply your selected language to the navigation bars and the menus that appear when a customer accesses your LoudDoc.
The Brand Kit sets the default language of your account. You can adjust the language individually for each LoudDoc from the DESIGN tab under Settings.
Themes
Themes are the fastest and simplest way to customize your LoudDoc presentation. You create your themes in the DESIGN tab. You can read more about creating themes here. All your custom themes are displayed in the Theme tool in DESIGN and listed here in your Brand Kit.
# Deleting A Theme
You can delete any theme you've created in the Brand Kit.This will remove it from the theme tool in the Design tab. Tap the Delete button associated with the theme you no longer want available.
Search Engine
You can choose to have all your LoudDocs indexable by the major search engines. When you select this option, we make your LoudDocs in your account visible to search engine crawlers, so you will appear in search results.
Important Tip Leave search engine off if your LoudDocs are not for general discovery. By default, LoudDocs are set to link only access.
Google Analytics
Getting good insight into the activity and engagement on your LoudDoc is key to making good decisions and following up with customers. You can connect your LoudDoc to your Google Analytics account and track all activity that takes place across all your pages.
You can use the Tracking ID or the Measurement ID from your Google Analytics account.
The tracking ID is a string like UA-000000-2. It must be included in your tracking code to tell Analytics which account and property to send data to.
The first set of numbers (-000000, in the example above) refers to your account number, and the second set of numbers (-2) refers to the specific property number associated with the account.
If you're working with a Google Analytics 4 property, you have a Measurement ID instead of a Tracking ID. A Measurement ID uses the format G-XXXXXXX, and identifies the data stream sending data to your Google Analytics 4 property.
Custom Domain
You can use your own domain on your LoudDoc account. This means that every LoudDoc you share, the weblink displays your domain instead of the louddoc.com domain. Its a very effective way to build confidence in your content when a customer see's it's from a trusted source.
You can add as many domains to your account as you would like, pointing the domain at all your LoudDocs, or at a specific LoudDoc or collection. Your team accounts can also have their own domains specific to their team account.
# Add Your Custom Domain
Here are the steps to adding your own domain. First, you'll need to go into your DNS manager (usually in a service like godaddy, bluehost, or even wix). This is where your www.mydomain.com is registered.
In there, you are going to add what is called a CNAME. Basically, this makes a new url where the "www" part of your domain is something like "new" or "latest" (really up to you what goes in there).
So, for LoudDoc's in your account, the url would be https://latest.mydomain.com/ instead of https://www.mydomain.com/ or https://louddoc.com.
So once you log into your DNS manager,
1. select "add" a new cname.
2. In the cname entry fields, add:
hostname: latest (or what you want for the first part of your domain).
points to: louddoc.com
TTL: 1 hour
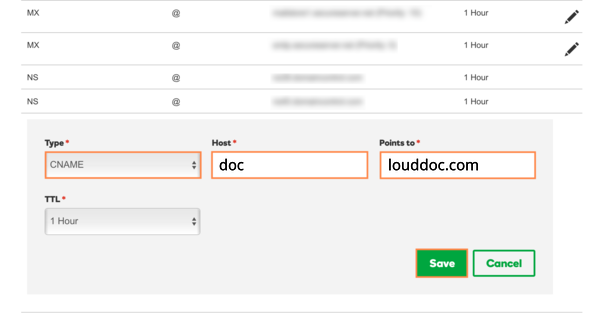
3. click "save"
This way your dns server will know to send any urls to your simplebooklet account instead of your website.
Now wait 1 hour while your dns propogates your domain across the internet.
Then, on your dashboard, tap the custom domain menu (left hand column) and tap the + button.
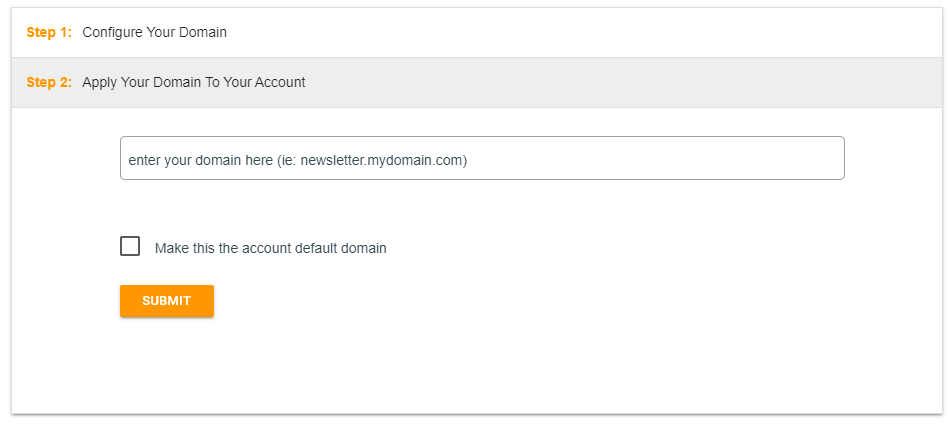
Type in your new domain name and select default to have it apply to your entire account. Don't check the default option if you want this domain only pointing to a specific LoudDoc.
You should now have a custom domain for your LoudDoc account and all your sharing links.
